URP下的视差遮蔽映射(带像素偏移)
前言
之前之所以要重写一遍URP的lit,其实主要目的就是为了这里能实现真正的带深度偏移的陡峭视差映射。
URP自带的视差映射只是最最基本的用射线方向和高度去做偏移,只能在高度不高时有一点效果,要想更高一点的高度,只能像HDRP一样,分层用类似光线步进的方式去采样。
高度图
高度图可以有多种使用方式,最简单的就是用来变化顶点,但需要模型面数很高。
或者曲面细分后位移顶点,对GPU就有要求了。
还可以在像素级别实现。
通过偏移UV,来模拟高度。URP自身的高度图就是这样的,但URP没有支持像素深度位移。
即仅仅偏移了UV,但像素的深度没有改变,会导致看起来物体悬空。HDRP则实现了这一功能。
先来看看URP默认的高度图是怎么做的吧。
主要是这个函数
ApplyPerPixelDisplacement(viewDirTS, input.uv);这里传入一个切线空间中的视线方向,以及UV,然后偏移这个UV,后续都采用偏移的UV来采样贴图。
uv += ParallaxMapping(TEXTURE2D_ARGS(_ParallaxMap, sampler_ParallaxMap), viewDirTS, _Parallax, uv);half2 ParallaxOffset1Step(half height, half amplitude, half3 viewDirTS)
{
// 应用缩放, 范围是[-amplitude/2, amplitude/2]
height = height * amplitude - amplitude / 2.0;
half3 v = normalize(viewDirTS);
// 魔法数0.42
v.z += 0.42;
// v.xy / v.z 反映出了视角方向的倾斜程度,倾斜程度越大,偏移越大
// 如果视角方向和法线方向平行,那么偏移为0
return height * (v.xy / v.z);
}这里的采样高度是最简单的一种方式,单纯用原点向视线方向偏移的方式,采样一次即可。
具体效果如下
在缩放比例较小时效果还可以,稍微增大一些就不如下面提到的方法了。
陡峭视差映射
主要参考自LearnOpenGL
具体的原理也不复杂,参看原文吧,下面给出Unity中的实现
float2 ParallaxMapping2(Texture2D heightMap, SamplerState sampler_heightMap, half3 viewDir, half heightScale,
                        float2 texCoords, float numLayers,float2 noiseUV,float _HeightMin, float _HeightMax)
{
    //每层深度
    float layerDepth = 1.0 / numLayers;

    // 当前层级深度
    float currentLayerDepth = 0.0;

    //视点方向UV偏移总量
    float2 P = viewDir.xy / (viewDir.z) * heightScale/10;

    //每层高度UV偏移量
    float2 deltaTexCoords = P / numLayers;

    //当前 UV
    float2 currentTexCoords = texCoords;

    float currentDepthMapValue = 1 - GetHeight(heightMap, sampler_heightMap, currentTexCoords,_HeightMin,_HeightMax);

    // 层高小于采样点高度,继续采样,直至采样点高度小于层高
    for (int i = 1; i < 200 && currentLayerDepth < currentDepthMapValue; i++)
    {
        // 按高度层级进行 UV 偏移
        currentTexCoords -= deltaTexCoords;
        // 从高度贴图采样获取的高度
        currentDepthMapValue = 1 - GetHeight(heightMap, sampler_heightMap, currentTexCoords,_HeightMin,_HeightMax);
        // currentDepthMapValue = 1 - getHeight(currentTexCoords);
        // 层高增加
        currentLayerDepth += layerDepth;
    }

    return (currentTexCoords - texCoords);
}
这就最简单的仅分层的视差映射了,当层数足够时,效果还可以,但如果层数太低,就会有分层的感觉,也算是光线步进的通病了。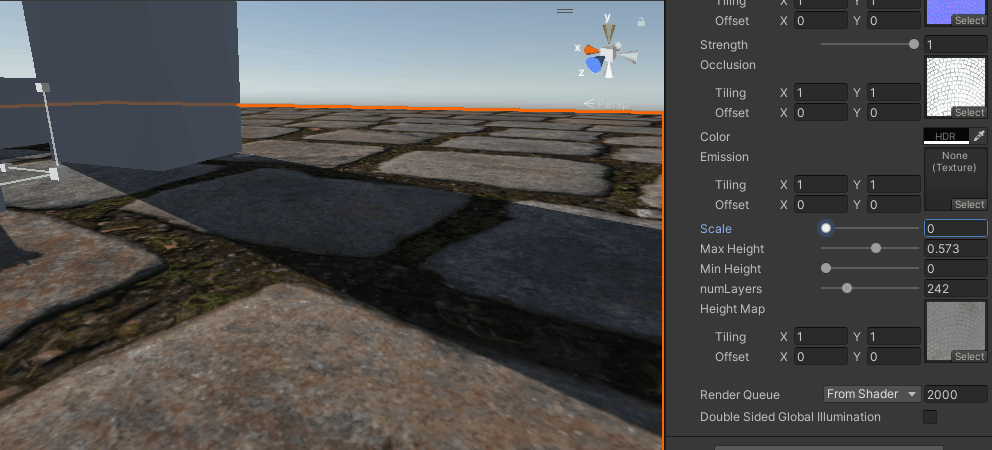
视差遮蔽映射
再然后就是对上述方式的改进,不是单纯用一个点来确定高度,而是用一个范围然后线性插值来得到,
改动如下
float2 ParallaxMapping2(Texture2D heightMap, SamplerState sampler_heightMap, half3 viewDir, half heightScale,
                        float2 texCoords, float numLayers,float2 noiseUV,float _HeightMin, float _HeightMax)
{
    //每层深度
    float layerDepth = 1.0 / numLayers;

    // 当前层级深度
    float currentLayerDepth = 0.0;

    //视点方向UV偏移总量
    float2 P = viewDir.xy / (viewDir.z) * heightScale/10;

    //每层高度UV偏移量
    float2 deltaTexCoords = P / numLayers;

    //当前 UV
    float2 currentTexCoords = texCoords;

    float currentDepthMapValue = 1 - GetHeight(heightMap, sampler_heightMap, currentTexCoords,_HeightMin,_HeightMax);

    float2 prevTexCoords = currentTexCoords;
    float prevDepthMapValue = currentDepthMapValue;
    float preLayerDepth = currentLayerDepth;

    // [UNITY_LOOP]
    // 层高小于采样点高度,继续采样,直至采样点高度小于层高
    for (int i = 1; i < 200 && currentLayerDepth < currentDepthMapValue; i++)
    {
        prevTexCoords = currentTexCoords;
        prevDepthMapValue = currentDepthMapValue;
        preLayerDepth = currentLayerDepth;

        // 按高度层级进行 UV 偏移
        currentTexCoords -= deltaTexCoords;
        // 从高度贴图采样获取的高度
        currentDepthMapValue = 1 - GetHeight(heightMap, sampler_heightMap, currentTexCoords,_HeightMin,_HeightMax);
        // currentDepthMapValue = 1 - getHeight(currentTexCoords);
        // 层高增加
        currentLayerDepth += layerDepth;
    }

    // return (currentTexCoords - texCoords);

    float prevDifference = preLayerDepth - prevDepthMapValue;
    float difference = currentDepthMapValue - currentLayerDepth;
    float t = prevDifference / (prevDifference + difference);
    return lerp(prevTexCoords, currentTexCoords, t) - texCoords;
}
能看出比之前要好上不少,尤其是相同层数的情况下,分层感少了很多,但还是有。
再加上抖动
这个做法来自这里,采用屏幕空间的随机噪声,来抖动采样层数。
float noise(float2 uv,float FrameId)
{
    uv += FrameId * (float2(47.0f,17.0f) * 0.695f);
    const float3 magic = float3(0.06711056f, 0.00583715f, 52.9829189f);
    return frac(magic.z * frac(dot(uv, magic.xy)));
}

    float minLayers = 10;
    float maxLayers = numLayers;
    maxLayers = maxLayers * 0.5f + maxLayers * noise(noiseUV,_Time.y);
    float adaptive = abs(dot(viewDir, float3(0, 0, 1)));
    numLayers = lerp(minLayers, maxLayers, adaptive);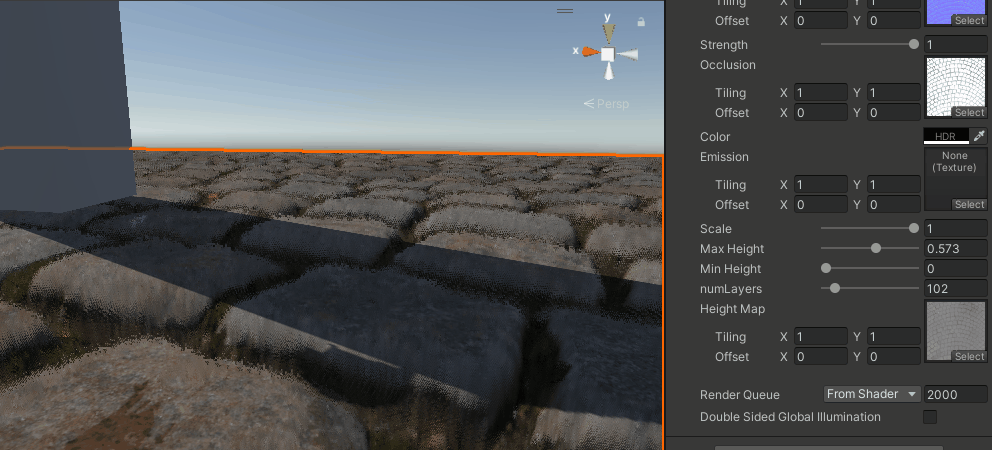
可能在有TAA的情况下效果会不错,但目前URP还没有(2023会有),这个就等下次手撸TAA的时候再来看吧。
HDRP中的做法
然后去翻了翻HDRP中对视差的做法,大体一致,但最后选择采样点时,不是单纯的用两个点来插值,
而是又加上了割线法,迭代三次,取一个更近似的解。
real2 ParallaxOcclusionMapping(TEXTURE2D_PARAM(heightMap,sampler_heightMap),real lod, real lodThreshold, int numSteps, real3 viewDirTS, float2 uv , out real outHeight)
{
    real stepSize = 1.0 / (real)numSteps;

    real2 parallaxMaxOffsetTS = viewDirTS.xy / -viewDirTS.z;
    real2 texOffsetPerStep = stepSize * parallaxMaxOffsetTS;

    real2 texOffsetCurrent = real2(0.0, 0.0);

    // real prevHeight = SAMPLE_TEXTURE2D_LOD(heightMap, sampler_heightMap, uv + texOffsetCurrent, lod).r;
    real prevHeight = ComputePerPixelHeightDisplacement(texOffsetCurrent, lod, uv,heightMap, sampler_heightMap);
    texOffsetCurrent += texOffsetPerStep;
    // real currHeight = SAMPLE_TEXTURE2D_LOD(heightMap, sampler_heightMap, uv + texOffsetCurrent, lod).r;
    real currHeight = ComputePerPixelHeightDisplacement(texOffsetCurrent, lod, uv,heightMap, sampler_heightMap);
    real rayHeight = 1.0 - stepSize; // Start at top less one sample

    // Linear search
    for (int stepIndex = 0; stepIndex < numSteps; ++stepIndex)
    {
        // Have we found a height below our ray height ? then we have an intersection
        if (currHeight > rayHeight)
            break; // end the loop

        prevHeight = currHeight;
        rayHeight -= stepSize;
        texOffsetCurrent += texOffsetPerStep;

        // Sample height map which in this case is stored in the alpha channel of the normal map:
        // currHeight = ComputePerPixelHeightDisplacement(texOffsetCurrent, lod, uv,heightMap, sampler_heightMap);
        currHeight = ComputePerPixelHeightDisplacement(texOffsetCurrent, lod, uv,heightMap, sampler_heightMap);
    }

    real pt0 = rayHeight + stepSize;
    real pt1 = rayHeight;
    real delta0 = pt0 - prevHeight;
    real delta1 = pt1 - currHeight;

    real delta;
    real2 offset;

    // Secant method to affine the search
    // Ref: Faster Relief Mapping Using the Secant Method - Eric Risser
    for (int i = 0; i < 3; ++i)
    {
        // intersectionHeight is the height [0..1] for the intersection between view ray and heightfield line
        real intersectionHeight = (pt0 * delta1 - pt1 * delta0) / (delta1 - delta0);
        // Retrieve offset require to find this intersectionHeight
        offset = (1 - intersectionHeight) * texOffsetPerStep * numSteps;

        currHeight = ComputePerPixelHeightDisplacement(offset, lod, uv,heightMap, sampler_heightMap);
        // currHeight = getHeight(uv + texOffsetCurrent);

        delta = intersectionHeight - currHeight;

        if (abs(delta) <= 0.01)
            break;

        // intersectionHeight < currHeight => new lower bounds
        if (delta < 0.0)
        {
            delta1 = delta;
            pt1 = intersectionHeight;
        }
        else
        {
            delta0 = delta;
            pt0 = intersectionHeight;
        }
    }

    outHeight = currHeight;

    // Fade the effect with lod (allow to avoid pop when switching to a discrete LOD mesh)
    offset *= (1.0 - saturate(lod - lodThreshold));

    return offset;
}
像素深度偏移
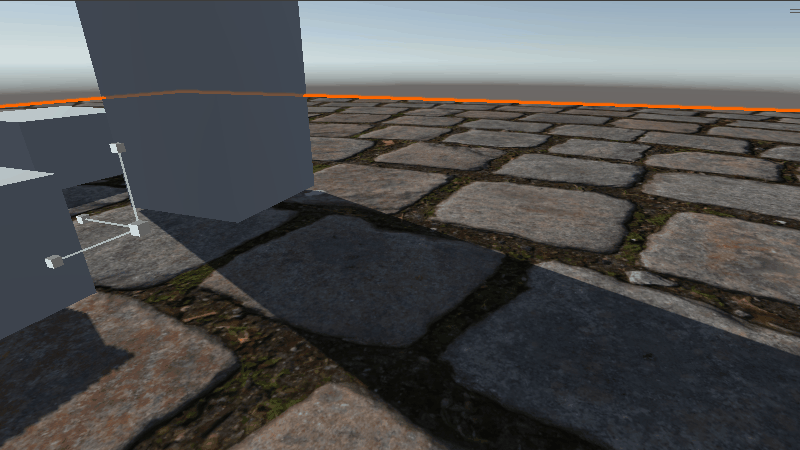
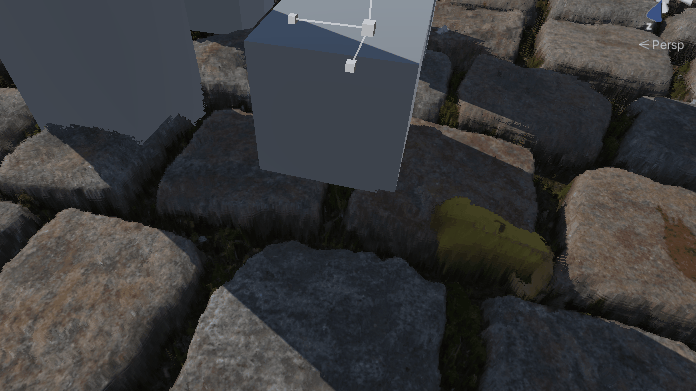
先看看没有深度偏移之前的样子
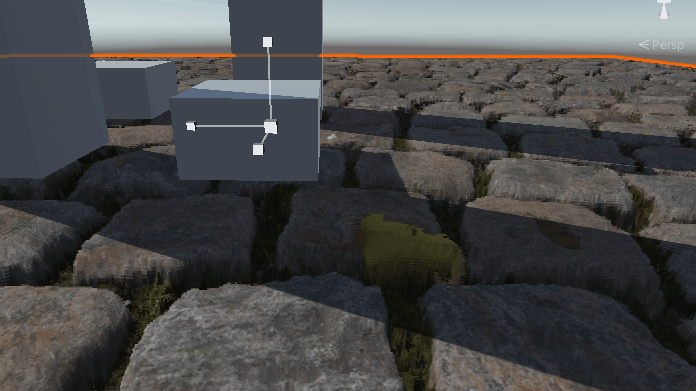
其他物体是浮在之前的平面上的,凹陷下去的部分也不会透显出其他物体。
这是因为写入的深度没有改变,还是之前平面的深度,实际应该根据视角和高度(深度),来像素级别的改变深度图。
所以这里需要SV_Depth这个关键字。
改动下原来的Shader片元的函数声明
void LitPassFragment(Varyings input, out half4 outColor : SV_Target0,out float outDepth : SV_Depth)
{
``````
float depthOffset = ApplyPerPixelDisplacement(viewDirTS, input.uv,input.positionCS.xy);
// ApplyDepthOffsetPositionInput(viewDirWS, depthOffset, GetViewForwardDir(), GetWorldToHClipMatrix(), input);
input.positionWS += depthOffset * (-viewDirWS);
float deviceDepth = ComputeNormalizedDeviceCoordinatesWithZ( input.positionWS, GetWorldToHClipMatrix()).z;
outDepth = deviceDepth ;
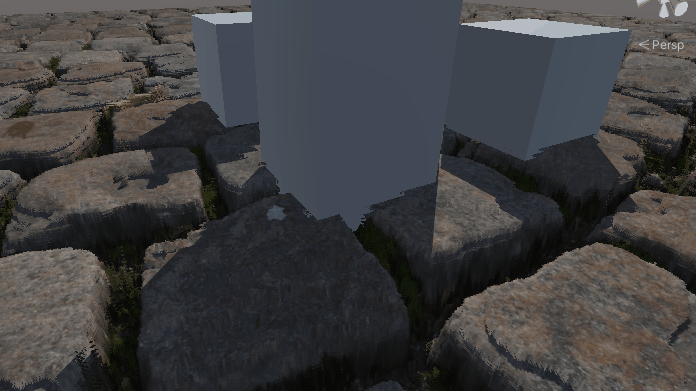
}这里的逻辑很清晰,就是把片元的世界坐标沿着视线的反方向偏移,然后再手动计算一次深度,最后吧把深度写入。
这时深度信息就正确了。
阴影
同样的,在绘制阴影贴图时,也要添加对应的深度偏移
改动一下阴影pass的片元着色器
half4 ShadowPassFragment(Varyings input,out float outDepth : SV_Depth) : SV_Target
{
    UNITY_SETUP_INSTANCE_ID(input);
    UNITY_SETUP_STEREO_EYE_INDEX_POST_VERTEX(input);

    float3 lightDirectionWS = _LightDirection;

    // half3 viewDirWS = GetWorldSpaceNormalizeViewDir(input.positionWS);
    half3 viewDirWS = normalize(lightDirectionWS);
    half3 viewDirTS = GetViewDirectionTangentSpace(input.tangentWS, input.normalWS, viewDirWS);
    float depthOffset  = ApplyPerPixelDisplacement(viewDirTS, input.uv,input.positionCS.xy);

    input.positionWS += depthOffset * (-viewDirWS);
    input.positionWS = ApplyShadowBias(input.positionWS, input.normalWS, lightDirectionWS);

    float deviceDepth = ComputeNormalizedDeviceCoordinatesWithZ( input.positionWS, GetWorldToHClipMatrix()).z;
    outDepth = deviceDepth ;
    return 0;
}
这里要注意的是,对于平行光来说,视线方向应该就是光线方向。
阴影也考虑高度的话其实挺吃性能的,一般这种用作地面的平面,不投射阴影仅接收阴影也可以,或者阴影少几层影响也不大。
VR
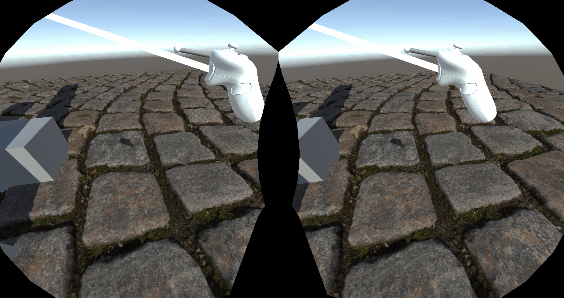
得益于URP的单通道渲染,几乎不需要什么改动就可以完美适配VR,VR下视差贴图的效果确实惊人,因为视差考虑到了双眼位置的不同,双眼的画面也就不同,这就比单纯的法线要生动真实的多。看来虚幻的VR开发指南中推荐用视差还是有道理的。
后续
如果说还有什么可以改进的,那就考虑软阴影,抗锯齿之类,以后有需要再说吧。